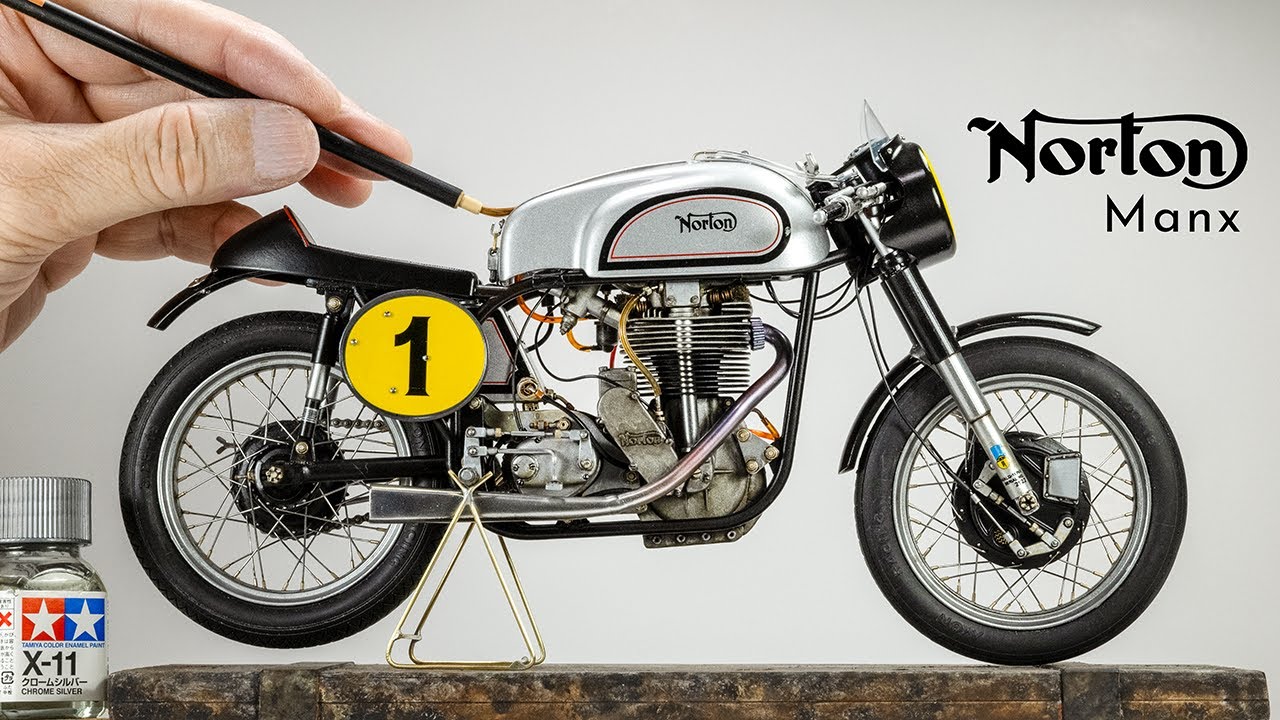
イタレリ ノートン マンクス ITALERI 1/9 Norton Manx 500
イタレリ ノートン マンクス ITALERI 1/9 Norton Manx 500
#nortonmanx #itareli #オートバイ模型
*Index
0:00 Prologue プロローグ
00:50 3D modeling
07:45 Wheel ホイール
10:12 Chain, Primary chain チェーン
11:42 Engine エンジン
15:10 Engine Head,Carburetor エンジン、キャブレター
19:09 Gearbox,Oil Tank ギヤボックス、オイルタンク
20:54 Frame フレーム
22:23 Swing arm スイングアーム
23:00 Separator セパレーター
23:31 Seat シート
24:05 rear suspension リヤサスペンション
24:56 Exhaust エキゾースト
25:46 Foot rest, shift pedal,brake pedal ステップ、ペダル類
27:43 Handle Bar, Windshield cowling ハンドル、カウル
30:17 Fuel Tank 燃料タンク
32:02 Motorcycle stand スタンド
32:30 Complete photo 完成写真
オートバイ模型を作り始めて2年目にしてイタレリ(プロター)のNorton Manxを作る事が出来ました。
Norton Manxは15年近く生産され、市販もされましたので、多くのプライベートライダーも乗った歴史的名車ですが、プラモデル界ではイタレリ(プロター金型)のこれのみです。
プロターについて
魅力的なオートバイを1/9スケールで生産していたイタリアのメーカーで、かってプロタージャパンが日本にありましたが、私はオークションサイトで見かけてプロターというメーカーを知りました。
オートバイ模型の好きな方には伝説的なメーカーだったと思います。
キットについて
キットのモデルは箱絵の表記から1950,1951年式と思われがちですが、Geoff Dukeがグランプリを獲った年を記載しており、キットは1961年から62年までの市販バージョンです。
半世紀以上も前のキットで、当時のそのままのクオリティーで今も販売されているのは驚きです。
ディテールに関しては生産された年代を考えると頑張っていますが、Manxが好きな人以外は見向きもしないキットだと思います。
もし、このキットを作ろうと思う人がいましたら、私は素組を推奨します。
あれこれ手を出してしまうと、全て作り直しレベルになるキットで、また、作り直すとあれこれ修正が必要です。
特に、フレームはまともではありません。
ディテールアップについて
このキットに関してのディテールアップは作り直しになります。
私は3Dプリントを使いました。
参照したデータは1960年の2面図と61年の写真です。
図面と写真をキットのホイールの大きさに合わせてスケールダウンして寸法を測りモデリングしました。
ホイール
ManxはH型リムなのでキットのホイールは違いますが、プライベートライダーはH型でないリムを多く使っています。
理由は剛性と軽量化のためであるようです。
H型リムをモデリングしましたが、キットのリムを使う事にしました。
ハブ
フロントハブに放熱フィンがないのでハブをモデリングしました。
フロント、リアサスペンション
フロントサスペンションはキットのものは太くて短いです。
図面と比べると太さは直径で約1.4mm太く10mm短いです。
10mmというのは模型ではあり得ない数字なので、調べてみると、これもいろんな種類があったようです。
どちらが標準なのか判りませんが図面の比率に合わせました。
エンジン
Manxのエンジンの特徴は大きなフィンです。ここはディテールアップしなくてはいけません。
キットのものはプラの塊で、一枚一枚カットして貼り付けようかと思いましたが、フィンの形状が単純なので、キットのエンジンを採寸してフィンを一枚一枚モデリングしました。
キャブレターと燃料セパレーター
セパレーターはキャブレターに取り付ける手法ですが、これは間違いです。
ボルトで吊り下げられているのが正解で、フレームのステー、もしくは燃料タンクにボルトオンされています。
燃料コックと合わせて3Dモデリングしました。
チェーン
モデリングしました。
1/12スケールまで製作可能です。これで、チェーンのディテールは大幅に改善されました。
蝶ボルト、ボルト類
全てモデリングしました。
ハンドル関係
ボルトや、レバー類は全てモデリングしました。
その他
キャップ類、エキゾーストのフランジ、燃料タンクの取付けヒンジ、リアブレーキアーム、フットレスト、チェンジペダル類も全てモデリングしました。
組立の注意点
フレーム
オートバイ模型の要はフレームです。このキットはフレームに難があります。
まず、キャスター角が少し寝過ぎです。
キットの太い短いフロントサスでは気がつきませんが、細く長くして気がつきました。
サスペンションの取付はフレームより外に出さないとタイヤと干渉します。
スイングアームの幅がハブの幅より狭く、スイングアームの幅にハブを合わせるとタイヤとチェーンがサスに干渉します。
素組が嫌なら、解消はサスを細く作り直しスイングアームを限界まで広げるか、スイングアームを作り直す必要があります。
さらに精度を出したいなら、フレームとスイングアームは一から作り直すことになります。
エキゾースト
オートバイ模型で心配なところはエキゾーストがきちっと収まるかです。
寸法たらずというか、フレームに一点で固定しますが、なかなか固定できません。
無理やり固定すると尻下がりになります。
6mm延長して、真鍮棒で固定しました。
このキットはそんなキットです。
3D CADについて
最近のCADやモデリング系のソフトは個人で使うには敷居が高いサブスクリプション契約が殆どです。
MACでも使えるFreeCADというオープンソース系のフリーソフトを使っています。
使いにくいソフトですが、高機能です。
なにしろ無料というのは評価が高く、使用前にネットに繋ぐ必要もありません。
3Dプリントについて
ELEGOO社の3Dプリンターを使っています。
3Dプリントが個人で使える時代になりましたが、3Dデータは出来ても、プリントアウトするにはコツが必要です。
上手くプリントアウト出来るよう3Dデータを作り変えたり、配置を変えたり、失敗は成功のもととよく言われますが、まさにその通りだと言う事を実感しました。
次は、Manxをジオラマ仕立てにしたいと思います。
ありがとうございます。


Merci pour ce partage d'une moto mythique qui m'a toujours fait rêver. Merci à toi l'artiste 🙏
Fabulous
no wonder it took so long. its worth the wait.
Really cool. 👍
Your scratch building and weathering is beyond exceptional!!! Outstanding result!!
Great to see you modifying and producing whole new parts and assemblies with CAD and 3D printing – especially the failures. May people think 3D printing is as easy as viewing a 3D object on screen and pushing a button. Nothing could be further from the truth. Thank you for showing your failure 'graveyard', many of us producing 3D printed parts, assemblies, and prototypes have our own. 💀😂😂
もう~プロですね🎉どれくらいの制作期間なのでしょう、ボルト、ナット、チェーンや小物類等、販売できるレベルです😊
Absolument fantastique ! Tu es le maître de la maquette plastique 😊🤘👍🙏🇯🇵
One the most beautiful Manx ever seen, including the "real ones" scale 1:1 !👍🤝
Hello dear friend, I congratulate you for your wonderful talent👌😘👏👏👏
amazing as always , i have the protar version of the same kit , any chance you would sell the 3d parts? cheers
Bonjour 🤗je me demande si le garde boue avant n’est pas placé un peu trop haut par rapport à la roue !?sinon super travail 👍c’est un réel plaisir de regarder ton travail sur de nombreux modèles que tu as sublimé en les rendant hyper réalistes et maintenant voici un tout nouveau modèle avec la technologie 3D avec en plus le très bon choix d’une moto mythique!!bravo pour ton travail 👍
Amazing build and excellent video!
I like your vdo so much. you have a lot of idea and can share method. how to do it .Superb. 👍👍👍👍👍
Extraordinary, beautiful Job. Bravo!!!
A magnificent model. It's a pity that you had to replace so many parts of the kit with your own 3D printed parts. Best wishes.
Absolutely stunning, please make your next project that of the early two stoke motocross bikes, I feel this category are sorely missing from the modeling world.
This is amazing work! Is there any way you can send me the 3d files so I can improve also my Protar model? Thank you
サムネ凄い 😮
I have this kit, and I have much admiration for your skill. I also enjoy 3D printing, but I have no skill at designing things.
I plan to build my Manx Norton at some time in the future, just researching at the moment.
Is there a chance you could share your STL files for what you have created? I would certainly pay for them.
🏁Beautiful build🏁
Simply amazing work!!! シェアしてくれてありがとう I've used CAD for smaller, simpler parts, but you have motivated me to try to build more complex parts!
Another masterpiece from you… 🙂
Kudos for designing the 3D parts yourself and not just buying them.
you rock sensei,detailing process made my jaw drop all the way watching video,I really wanna have your artpiece for a decoration👍
bonjour mon ami encore du très beau travail ces superbe bravo 👍
Excellent work!! Would it be possible to get your printed pieces or the files you have designed? paying, of course, for that great job. Thank you
Votre réalisation est grandiose. Cela dit, il ne reste plus grand chose de la maquette Esci d'origine qui date de la fin des années 60.
プロというより、むしろ匠ですね。
Un gran trabajo, muchas gracias por compartir sus conocimientos.
One of the most detailed Manx's shown on YouTube!!
I've send you a personal message with some photo's and a request for the stl-files. Thanks in advance and keep up the good work.
Highly inspiring work!
This is a fantastic build. You should be proud. Any chance to get the stl files? For a fee of course!
you just about remade the whole model.
3Dプリントというこれまでの作品に込められた拘りがより形になりやすいツールを得て
いっそう目が離せない存在のchにアップデートされていますね。
Good day. Are you willing to sell your files to print some pieces?
Thank you for putting all these video's online with explanations 🙏. I've been watching a lot of them lately, I love your paint technic for reproducing steel parts and your weathering.
Hello from a sunny England in March, I'm loving your build. You are so Skilled and talented. Sadly I don't have the time to learn a 3d program. I would be very gratefull if you could send me the 3d print files you made for this build? I will gladly pay for them.
Very intersting. I have an old kit from Protar before Italeri. I am going to use some of your methods to build mine . Thank you for sharing here .
Oh my god! I found very, very small pictures of your Norton on Google and used them as reference for my build! I have to admit that this old model is a pain in the ass and I'm still building it, from scratch, piece by piece 🙂 I don't use 3D printing – I don't have a resin printer, but I use the same techniques as you and lots and lots of handiwork. I hope that I can get at least a little closer to your level 🙂